Ranger Logos
Making an EL Wire Ranger Logo
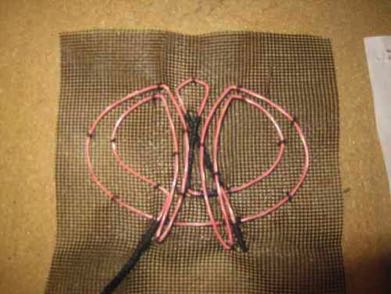
I've been making EL wire ranger logos for my shift partners since 2011. Here, I'll share the secrets for how to make one of your own.
The basic design employs angelhair EL wire, which is 1.2mm in diameter. Working with wire this narrow takes some practice. The overall size of the piece is 3 3/4" wide by 2 1/4" tall and is shown to the right.
You can use either angelhair (1.2mm) or regular high-brightness (2.6mm) EL wire. The angelhair wire is easier to bend and can be made to look nicer, but it is much harder to work with and takes more skill. Regular EL wire is easier to solder and use, is brighter, and makes a slightly bigger logo but doesn't bend as well for some of the corners. However, both types of wire work well enough, and templates are provided for each one above. To the right is a picture of a logo with angelhair wire (top) and regular EL wire (bottom). Both are using the same driver.
To work with the wire, you'll need a very fine pair of needle-nose pliers (green handle). The end should be very small for working with the wire. You'll also need a pair of cutters (red handle).
You'll also need some 24 gauge steel wire. You'll use this wire to make small staples. The staples are what you use to secure the wire to the mesh later.

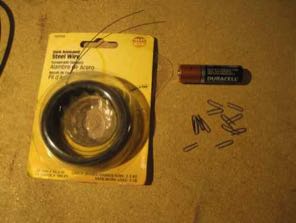
The last thing you'll need is some heat shrink tubing and a heat gun. For angel hair wire, I recommend using 1/16" tubing as it will seal tightly to the wire.
WARNING!!! When using a heat gun to shrink tubing on EL wire, do not point the gun straight at the tubing and hold it there for more than a second or two. If you apply too much heat too quickly, the casing of the EL wire itself can melt and cause short circuits. If needed, heat the shrink tubing a little at a time until it contracts appropriately.
Prepping the Mesh
Start by printing out the logo template from the PDF template and trimming it down to a more manageable size. Then cut a piece of screen door mesh (available at any hardware store) to the same size.

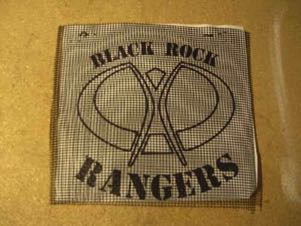
Next, make a couple of staples to pin the template to the screen door mesh. For pinning the mesh, use wider staples to provide more surface area against both the mesh and the template. Place the staples along the top edge so that you can flip the mesh up and access its back.
Tracing the Path of the EL Wire
There is a specific pattern to follow with the EL wire. Start near the bottom in the vertical portion next to the man's left leg. Feed the EL wire up through the mesh from underneath so that the wire starts at the corner and goes vertically along the man's leg. Pin the lead part of the wire to the mesh from underneath.


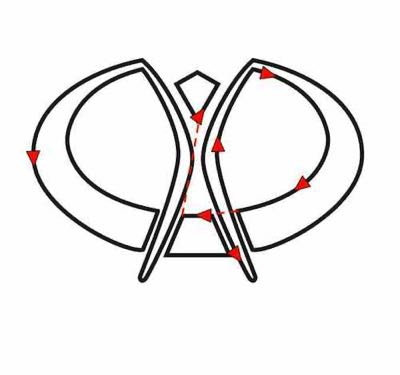

From the starting point, continue up the edge of the wing and make a left turn at the top. Follow the contour of the inner portion of the wing until you reach the man's arm. Make a sharp right turn and head down to form the outer portion of the man's arm. Curve around at the foot and head back to form the rest of the arm and the outer portion of the left wing.
When you reach the bottom of the wing, feed the EL wire back underneath the mesh so that it passes behind the leg. Before you feed it back up through the mesh on the other side, slide a small piece of heat shrink tubing over the wire. The heat shrink tubing should be just the width of the gap it needs to span. Make a similar jump under the (not-yet present) right leg and continue to form the outer portion of right wing and the inner portion of the man's right arm and leg.
Finish the man's leg and arm, followed by the inner portion of the right wing. Make another jump across the man's leg (remembering to include heat shrink tubing for each jump) and finish the top bar of the bottom trapezoid. Feed the wire back through the mesh and make a long jump (with heat shrink) to the bottom corner of the man's head.
Trace the man's head counter-clockwise, ending back at the bottom. Make another long jump to the bottom portion of the right wing. Finish the right wing and leave a little extra wire at the end. Cover the excess wire with heat shrink tubing to hide it. Leaving this excess (covered) wire gives you a secure way to pin the end of the wire to the mesh without having a loose end.
Pinning the Wire to the Mesh
You'll pin the EL wire to the mesh backing using small metal staples. Cut some 24ga wire into 1" lengths. Using the pliers, grip a piece of wire in the middle as shown to the right.
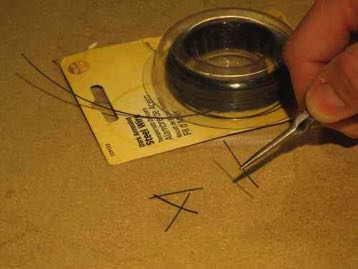

Fold both ends of the wire up to create a small staple. Adjust the staple as needed to make sure it is just a little bigger than the width of the wire itself and as parallel as you can get it. Inserting staples is more difficult when the ends of the staple are both pointing inward. Making the ends more parallel makes it easier to insert them.
Create a few dozen staples. You'll need them to pin the wire at critical points. The following diagram shows the recommended spots to place staples. Use additional staples as needed to attain the shape you want in the logo. (Staples not sitting directly on the figure correspond to staples holding the start and end of the wire.)

To place a staple, feed it from underneath the mesh and around the wire. Fold the ends down across the wire so that it is snug but not super tight. (If you make it too tight, you could short out the wire.)
Clip the ends of the wire and fold the ends so that they point down toward the mesh. Doing that minimizes the sharp edges on the surface that can catch on all sorts of things (like clothing). It also makes it easier to touch the wire and mesh once you're done.

You'll want to clip the wires as you go to get them out of the way of new wire you lay down.
Heat Shrink Tubing
At points where you need to jump behind one of the man's legs, add heat shrink tubing to hide the wire in the gap. Here is a picture of what this heat shrink looks like before heating.

